Why slicing thickness matters
Low-temperature vacuum frying works at 80–100°C, so heat moves through each slice more gently than in open frying. That gentleness is what keeps colour, flavour and nutrients in the product — but it also means the thickness of every slice has a direct say in the result. A slice that is too thick for its batch stays soft in the middle while the outside is already done. A slice that is too thin can turn brittle, break in the basket, or scorch before the rest of the batch is ready.
Thickness is one of the few variables you control before the fryer even starts. Oil temperature, vacuum and frying time are set on the control panel, but the cut is decided at the slicing table. If your batches come out uneven, check the slicing before you change a machine setting.
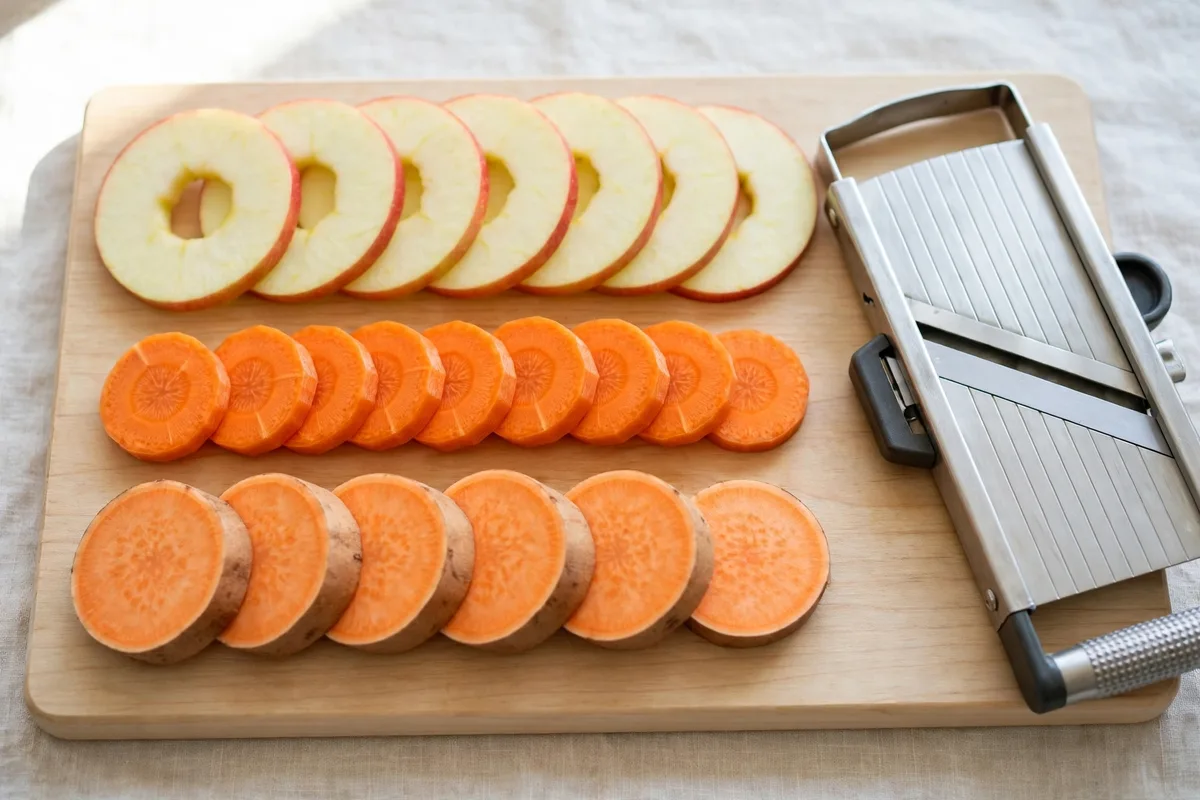
How thickness affects frying, texture and oil
Thickness changes how fast heat reaches the centre of a slice and how fast moisture leaves it. Thicker slices take longer to dry through; thinner slices dry through quickly and crisp sooner. When a batch contains both, no single frying time suits every piece.
When slices are too thin
- They crisp fast but can become fragile and break during frying, de-oiling or packing.
- Delicate products such as soft fruit can curl, fold or stick together in the basket.
When slices are too thick
- The centre stays soft and moist while the surface looks finished, so the texture is uneven.
- Longer frying time raises the chance of darkening and of extra oil clinging to the surface.
Thickness also affects oil indirectly. Over-fried pieces pick up more surface oil, and a batch that stays in the oil longer than it should gives the oil more time to cling. Uniform slices that fry evenly and go through the full in-chamber de-oiling step keep a well-run process at an oil content below 18%.
Why uniform thickness matters more than the exact cut
There is no single correct thickness for vacuum frying, because every product is different. What matters is that all the slices in one batch are the same. A batch of uniformly thick slices fries at the same rate, so one frying time suits the whole basket and every piece finishes together. A batch of mixed slices can never do that, however good the fryer is.
Uniformity also makes your process repeatable. When the cut is consistent, the same frying settings give the same result. When the cut drifts, every batch behaves differently and you end up chasing settings instead of fixing the real cause.
- Sort out slices that are clearly thicker or thinner than the rest before loading.
- Keep the off-size pieces for a separate batch, sliced to their own thickness.
- Check slices from different parts of the batch, not only the first few off the slicer.
Choosing thickness for different products
Choose thickness by the product, not by habit. Dense, starchy products and soft, watery products behave very differently in the fryer, so the cut that works for one can fail for another. Consider how much moisture the product holds, how firm its structure is, and how crisp you want the finished snack to feel.
Root vegetables and chips
Root vegetables such as potato, sweet potato, carrot and beetroot are dense and hold their shape well. They suit a firmer, more substantial cut that stays intact through frying and de-oiling. Blanching is standard for chips and fries and strongly recommended for root vegetables: it softens the structure evenly, so a thicker slice still fries through.
Delicate fruits
Soft fruits such as strawberry and mango are fragile and high in moisture. They need a gentler cut: thick enough to hold together in the basket, thin enough to dry through at 80–100°C without a long stay in the oil. Delicate fruits are usually not blanched, so the cut carries more of the work — an even slice is what keeps them from tearing or going limp.
Firm fruits and other products
Firm fruits such as apple and banana sit between the two groups: sturdy enough to slice cleanly, soft enough to need care. A medium cut usually suits them, adjusted by trial toward thinner for a lighter crisp or thicker for a heartier bite. For any new product, start from the thickness that worked for the closest product you already fry, then adjust in small steps.

Slicing equipment and thickness control
Consistent thickness comes from the slicer, not from a steady hand. A fixed slicer setting, a sharp blade and a steady feed rate are the three things that keep the cut the same from the first slice to the last. Hand slicing can work for very small test batches, but it will not hold a consistent thickness across a production day.
- Use a fixed setting: lock the slicer to one thickness for the whole batch and do not adjust it mid-batch.
- Keep blades sharp: a dull blade tears soft products, drags the cut uneven and produces slices that vary from one side to the other.
- Feed steadily: pushing product through too fast or too slowly changes the cut, especially with soft fruit.
- Check the first slices: measure or compare the first few slices before running a full batch through the slicer.
- Sort before loading: remove broken pieces, end pieces and any slice that is clearly off-size.
Raw material matters too. Fruit and vegetables that vary in size, ripeness or firmness will slice differently even on the same setting. Sort your raw material by size and ripeness before slicing.
Testing and adjusting with small batches
Never set a new thickness on a full production batch. Run a small test batch first, look at the result honestly, and adjust one thing at a time.
- Slice a small amount at the thickness you expect to use, keeping the cut as even as you can.
- Fry it at your usual settings for that product, with the basket loaded in a single even layer.
- Let the batch cool, then check the centre of the thickest pieces and the edges of the thinnest ones.
- Taste and handle the result: is it crisp through, or soft in the middle? Does it break too easily?
- Change only the thickness — thinner or thicker in a small step — and run the test again.
- When the result is right, write the thickness setting down with the product name and the frying settings that went with it.
Keep a short record for every product: slicer setting, raw material notes, frying settings and the result. Over time that record becomes your own slicing guide, built from your products and your machine. Confirm the final settings with your supplier and your own product trials before you lock them in for production.
Common slicing mistakes
- Mixing thicknesses in one batch: the most common cause of uneven colour and texture. Sort first, fry second.
- Changing thickness and frying time together: when two things change at once, you cannot tell which one fixed or caused the problem.
- Skipping the sort: end pieces and broken slices fry faster than the rest and can scorch.
- Overloading the basket to save time: piled slices shield each other from the oil, so even a perfect cut comes out uneven.
Thickness and your fryer setup
Thickness and batch size work together. A thicker cut needs more time in the oil, so a full basket of thick slices puts more demand on the fryer than the same basket of thin ones. Load the basket in a single even layer, at the level given in your manual, and give the oil room to move around every piece.
QS vacuum fryers are controlled by a Delta PLC with an MCGS touchscreen, which runs the frying cycle, the vacuum, the heating and the in-chamber centrifuge. When you change thickness for a product, check that the frying settings on the panel match the ones you recorded for that cut, and let the de-oiling cycle run to completion before opening the vessel. Pre-freezing is an optional variant for some products, such as strawberries and chips or fries — never a default step.
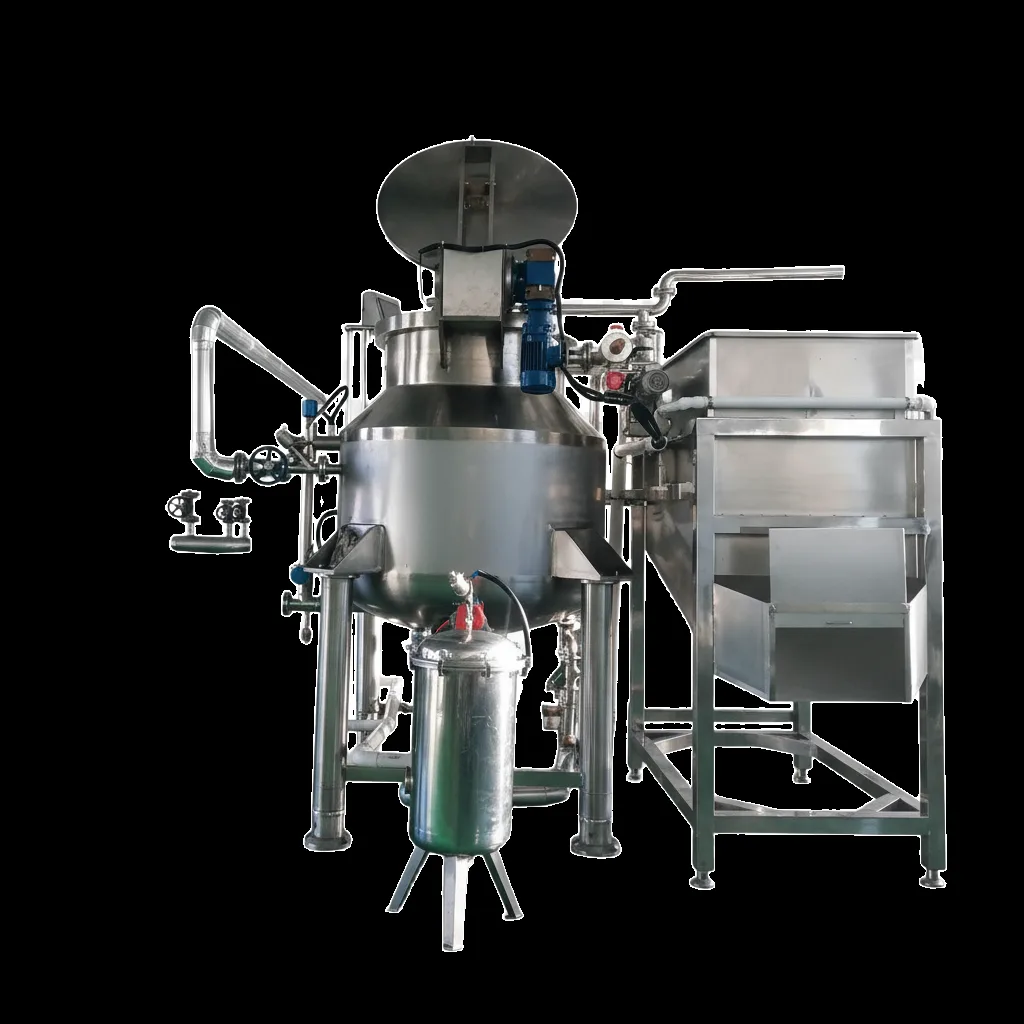
QS vacuum fryer models
| Model | Batch size |
|---|---|
| QS-VF100 | 100KG/batch |
| QS-VF150 | 150KG/batch |
| QS-300 | 300KG/batch |
- Low-temperature vacuum frying at 80–100°C
- Oil content below 18% with in-chamber centrifugal de-oiling
- Delta PLC + MCGS touchscreen control
- 304 stainless steel construction
- QS-300 vessel: 2600mm high × 1600mm diameter
Frequently asked questions
What happens if my slices are cut to mixed thicknesses?
Thin slices finish before thick ones, so a mixed batch comes out uneven: some pieces are overdone while others are still soft in the middle. Sort slices to one consistent thickness before loading, and set aside off-size pieces for a separate batch.
Should I slice thinner or thicker for a crunchier snack?
Thinner slices usually crisp more easily, but slicing too thin can make delicate products fragile and easy to break. Fry a small test batch, then move thinner or thicker in small steps until the texture matches what you want. Change only the thickness between tests.
How do I know my slicing is consistent enough?
Check a handful of slices from different parts of the batch side by side. If you can see or feel a clear difference between the thickest and the thinnest, the slicing is not consistent enough. A fixed slicer setting, a sharp blade, and sorting out off-size pieces are the three checks that matter most.
Does slicing thickness affect oil content?
Yes, indirectly. Uneven thickness means some pieces spend longer in the oil than they need to, and over-fried pieces pick up more surface oil. Uniform slices that fry evenly and go through the full in-chamber de-oiling step keep a well-run process at an oil content below 18%.
Talk to us about your vacuum frying line
Tell us your product and batch size — we will help you work through the right setup for it. See the range on our vacuum fryer page.
Specifications are for reference only and are subject to the final supplied equipment.